

실습을 위한 환경 구성
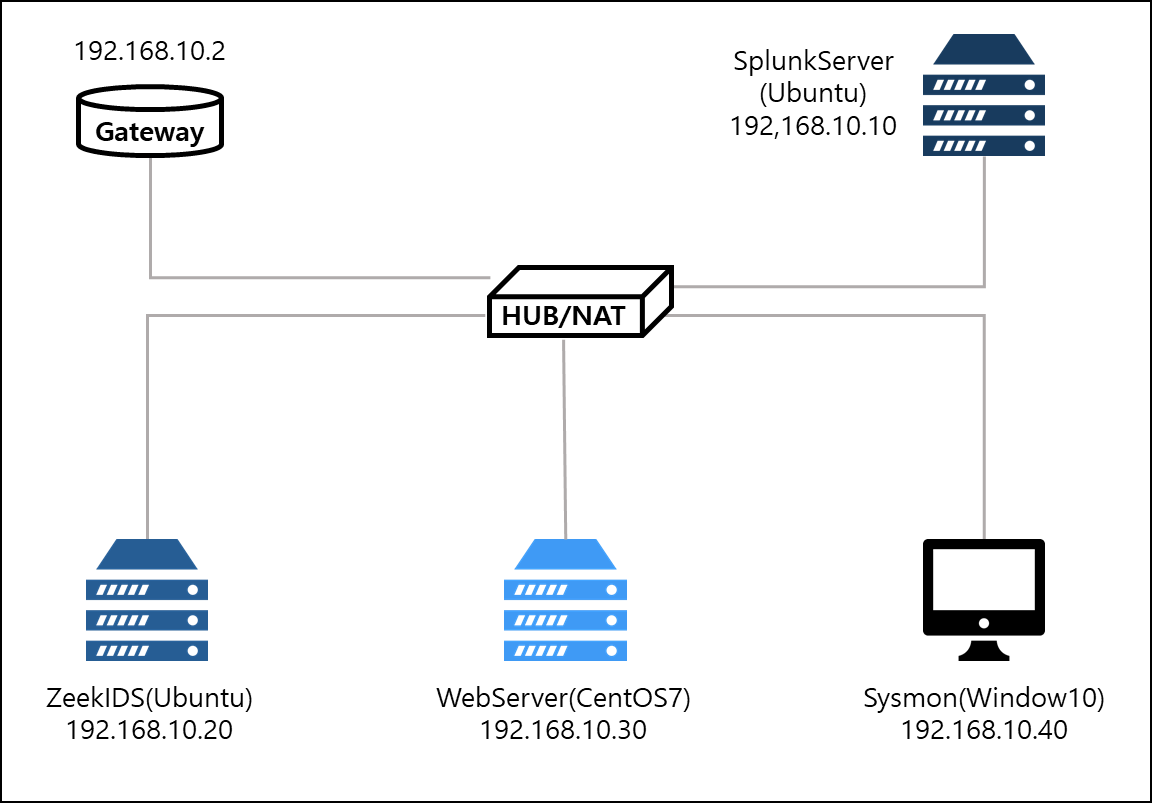
- VMware는 허브라고 생각! 허브 이름은 NAT08
- 192.168.10.0/24
- GW : 192.168.10.2
- DNS : 192.168.10.2
| Splunk | Ubuntu | 192.168.10.10 | 255.255.255.0 | 중앙관제서버 |
| ZeepIDS | Ubuntu | 192.168.10.20 | 255.255.255.0 | NMS 로그 전송 |
| WebServer | Cent OS 7 | 192.168.10.30 | 255.255.255.0 | SMS 로그 전송 |
| Sysmon | Windows 10 | 192.168.10.40 | 255.255.255.0 | 엔드포인트 로그 전송 |
=> 중앙서버에게 로그를 넘기면, 중앙서버는 로그를 수집하고 분석하고, 관리자에게 알리고, 보고서 작성하는 일을 함
VMware 설치 및 환경설정
[이전 포스팅 연결]
=> 현재 비공개 포스트
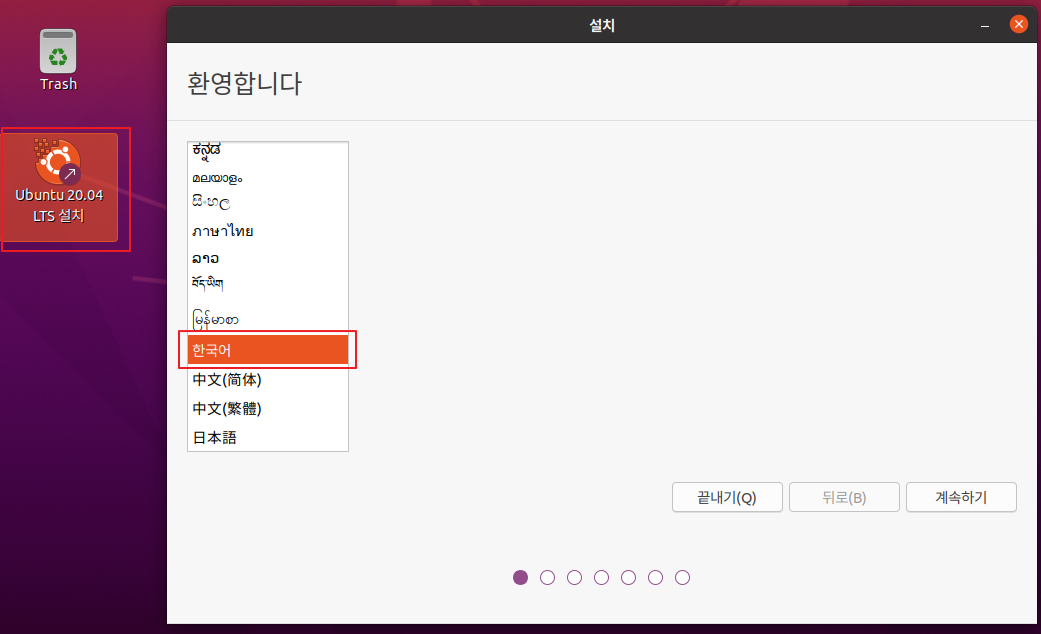
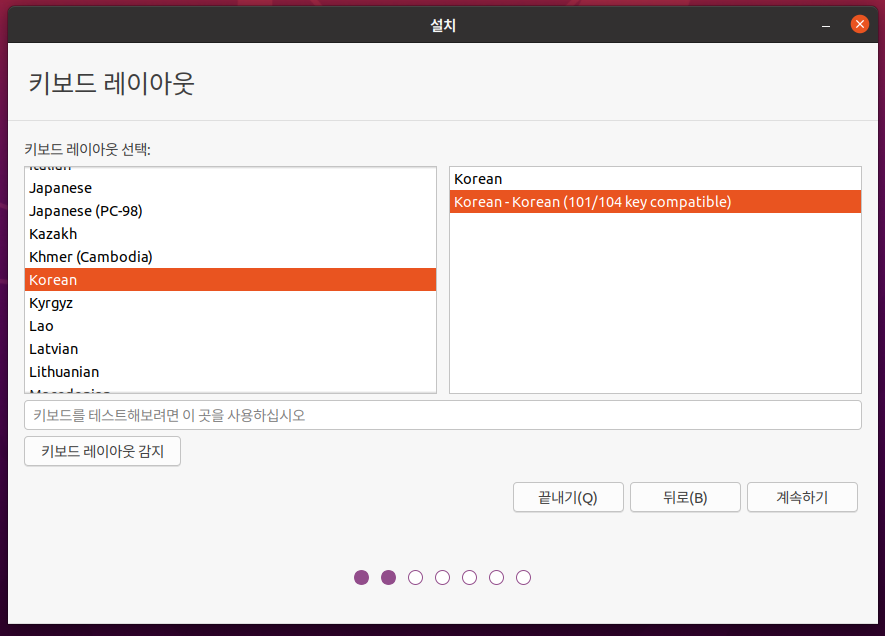
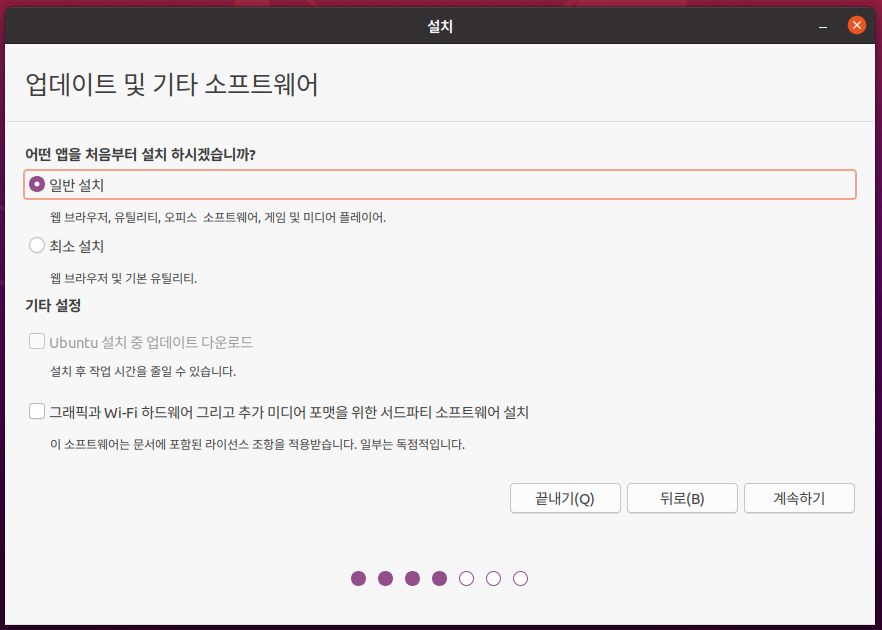
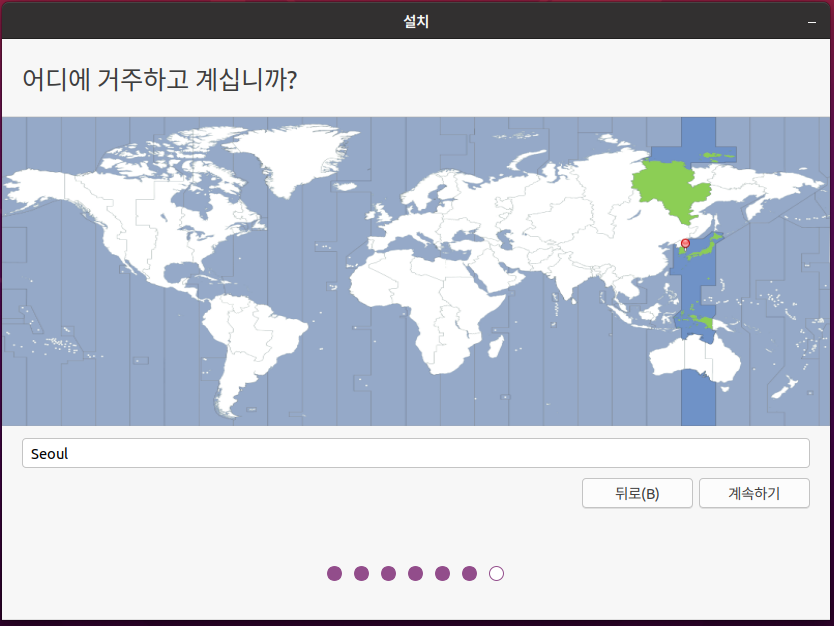
Ubuntu 설치
다운로드 : https://old-releases.ubuntu.com/releases/20.04/
Index of /releases/20.04
Select an image Ubuntu is distributed on three types of images described below. Desktop image The desktop image allows you to try Ubuntu without changing your computer at all, and at your option to install it permanently later. This type of image is what m
old-releases.ubuntu.com

=> ubuntu-20.04-desktop-amd64.iso 다운로드
VMware에서 Ubuntu 환경설정(Splunk / ZeekIDS)
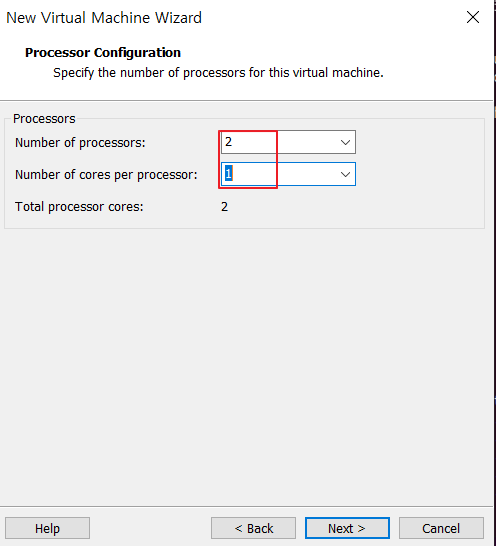
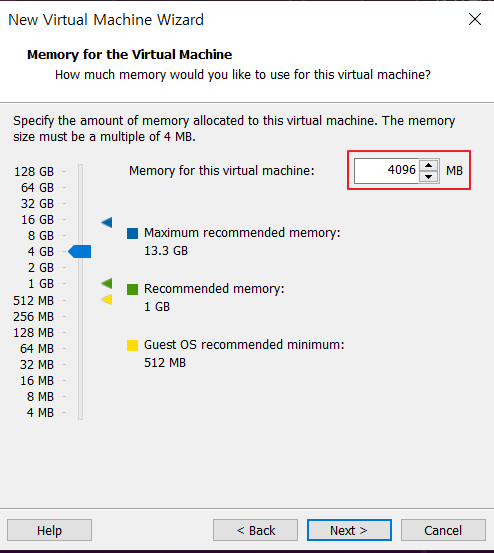
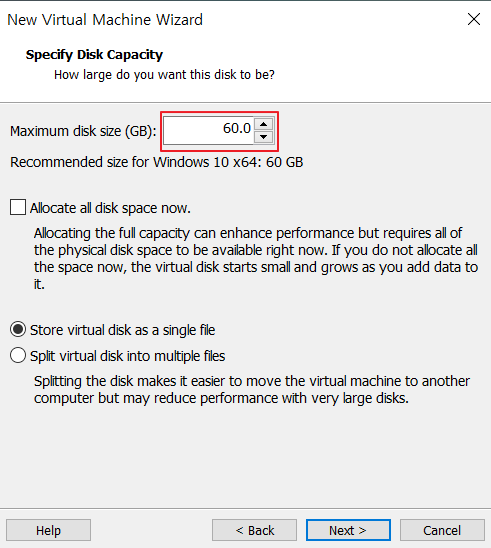
1) Create a New Virtual Machine을 클릭하여 다음과 같이 설정합니다.
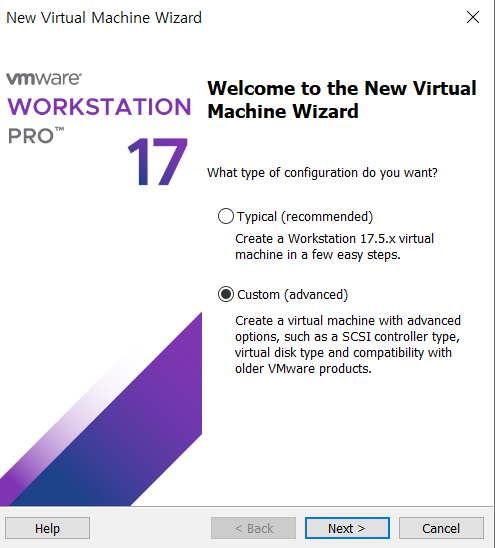
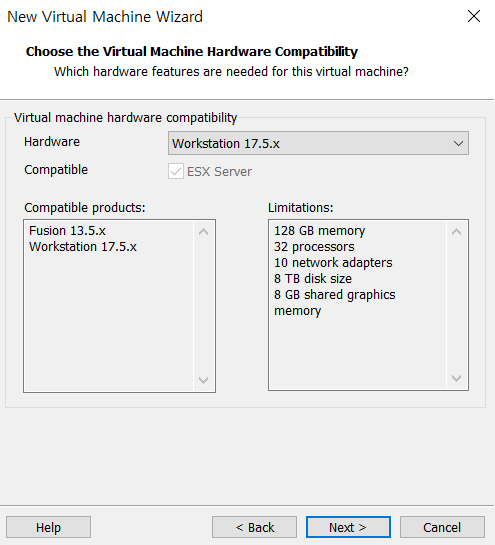
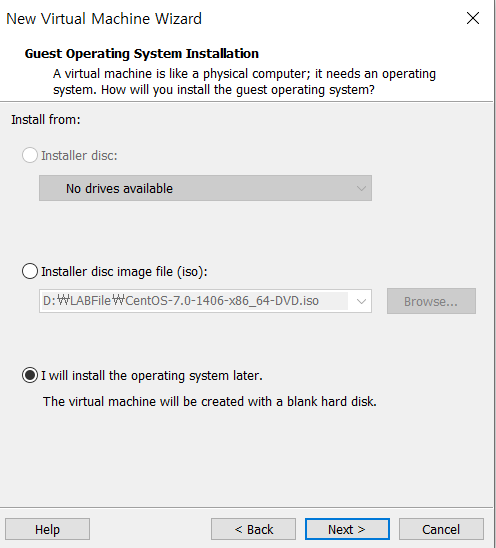
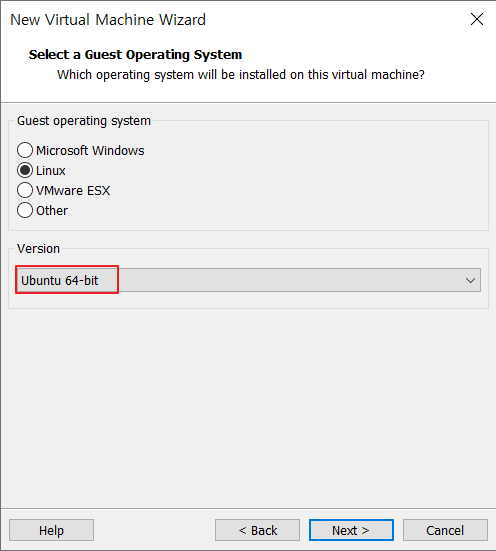


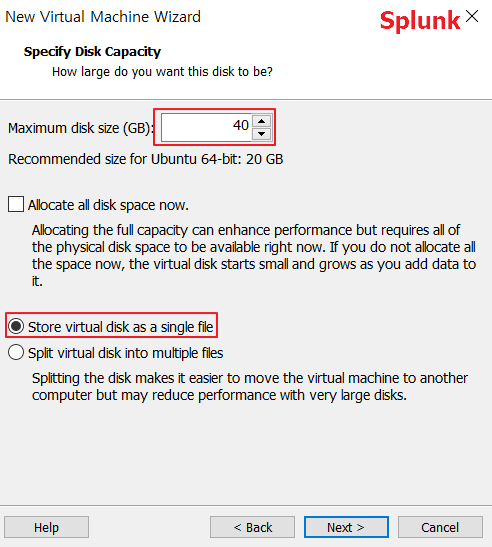

=> 사진에 없는건 Default
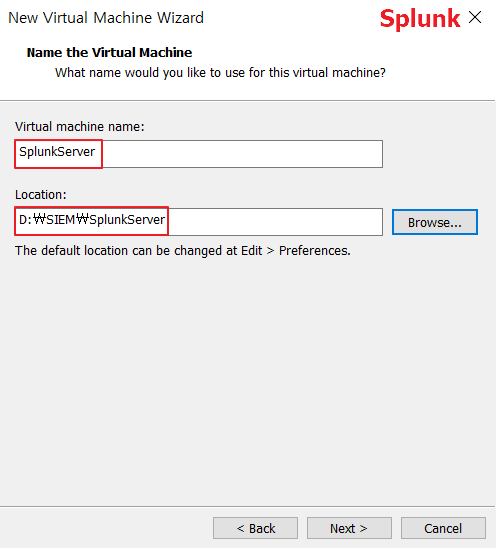
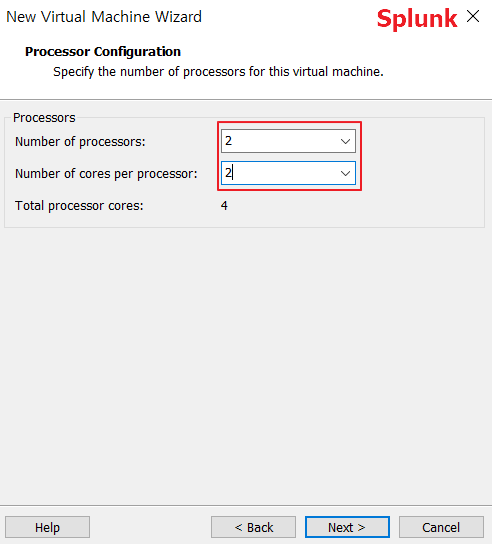
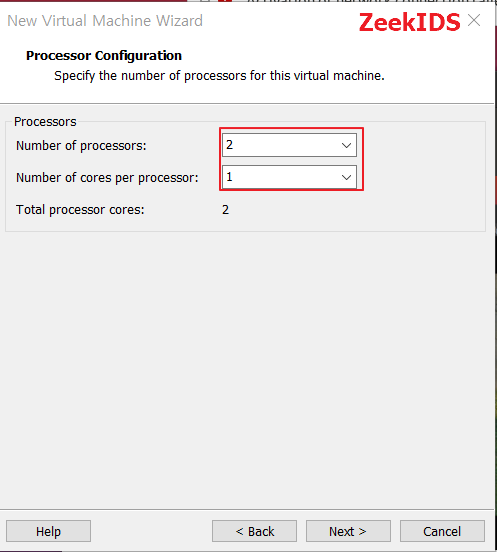
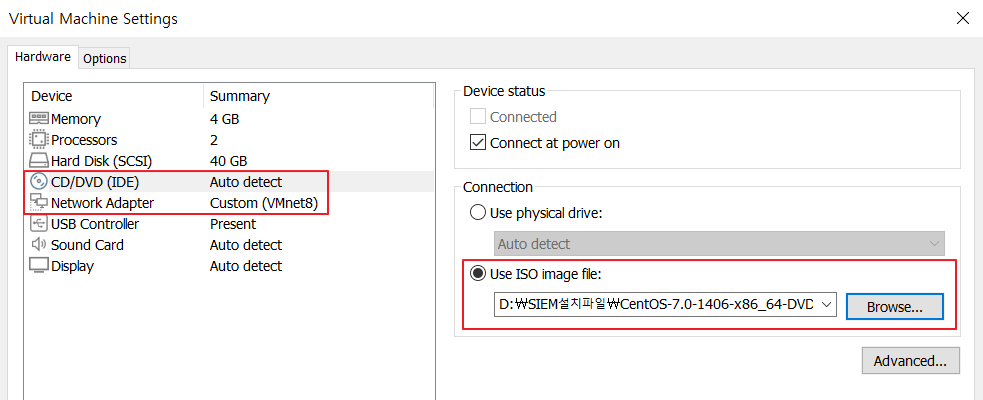
2) Splunk를 생성 후 Edit virtual machine settings를 클릭하여 다음과 같이 설정해줍니다. (ZeekIDS도 동일하게 설정)
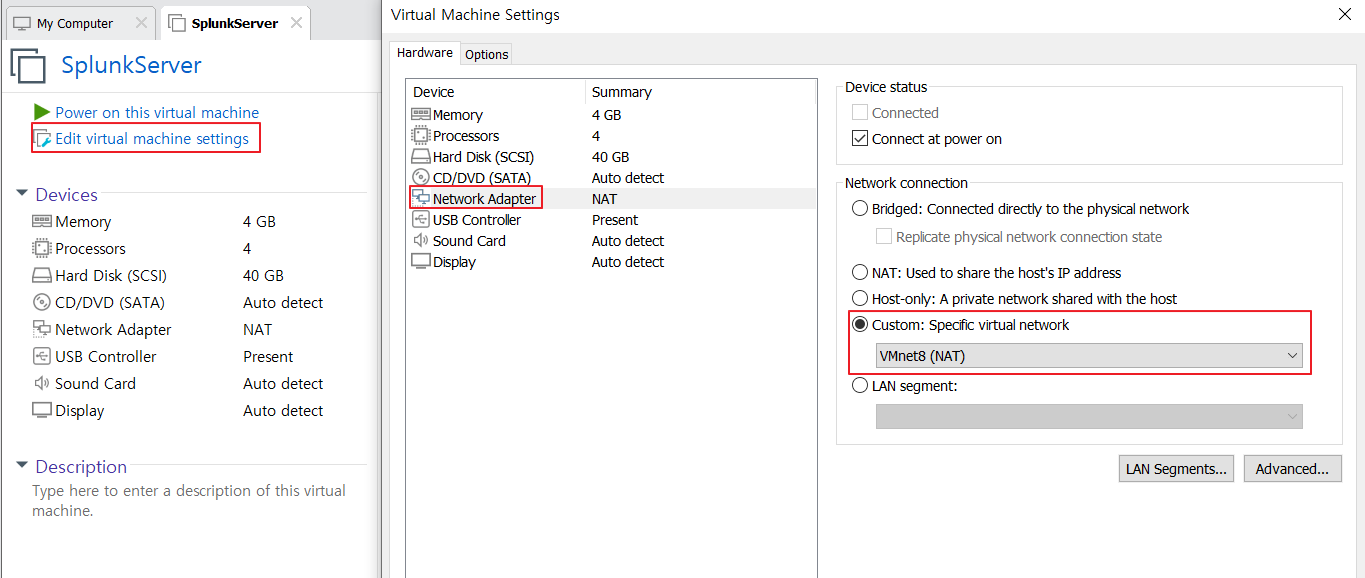
=> Network Adapter를 VMnet8(NAT)로 설정
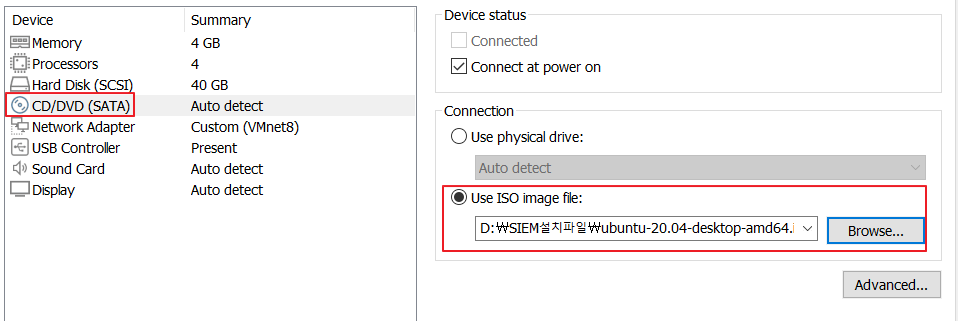
=> CD/DVD에 다운받은 이미지 파일 사용
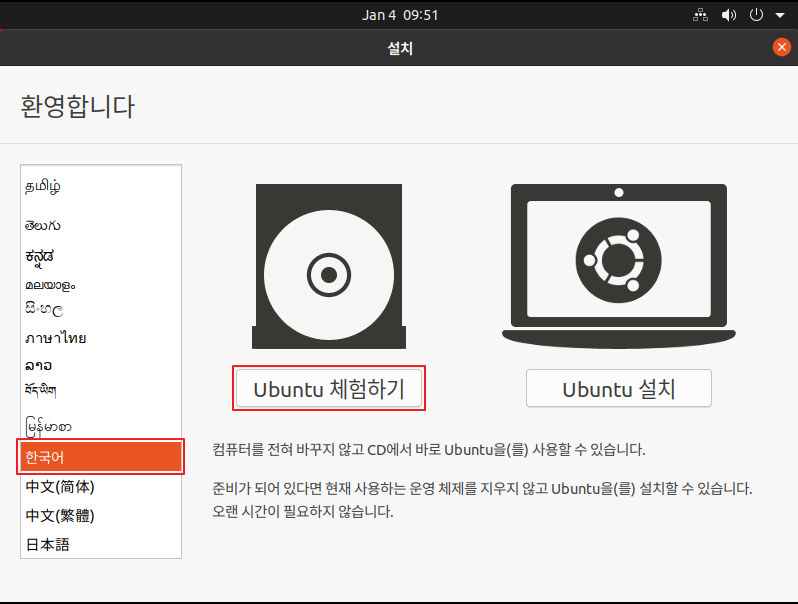
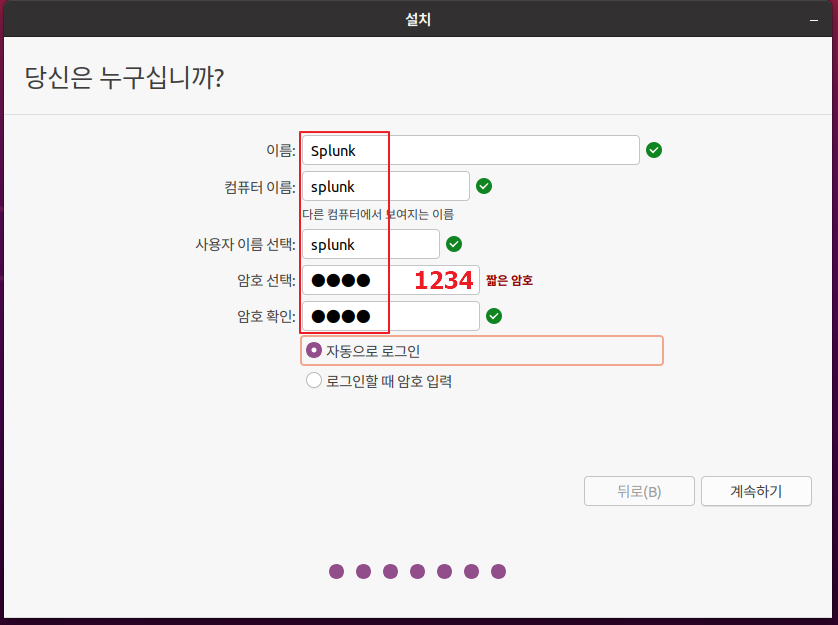
3) Power on this virtual machine을 클릭하여 가상머신을 켜고, 최초 환경설정을 합니다.


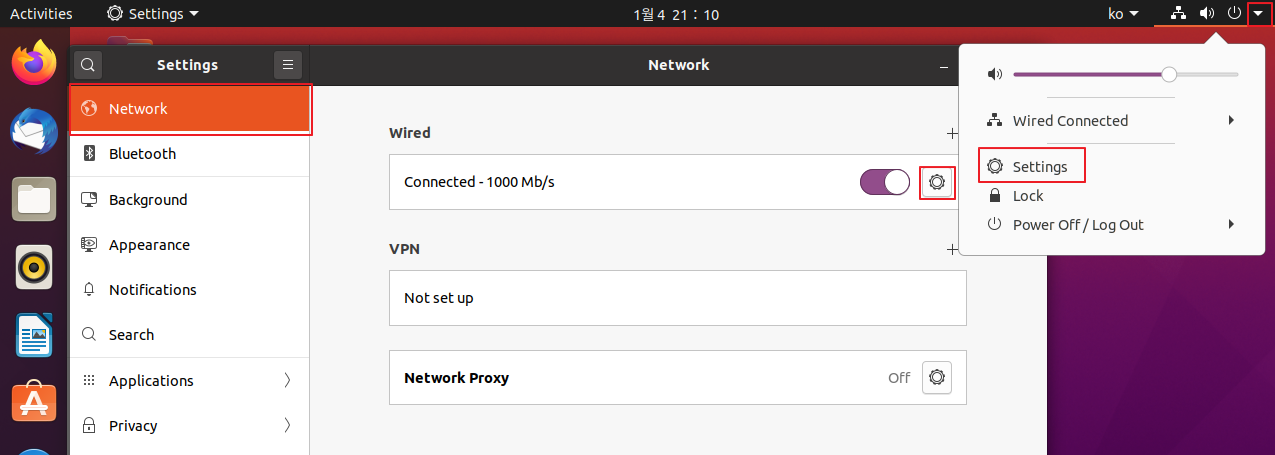
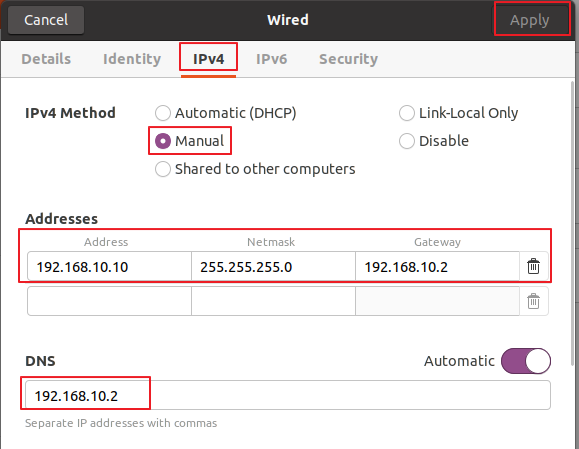
4) 네트워크 설정을 합니다.
Splunk : 192.168.10.10
ZeekIDS : 192.168.10.20
설정-Network-IPv4-Address(192.168.10.10 / 255.255.255.0 / 192.168.10.2)-DNS(192.168.10.2)
5) 우분투 패키지 저장소
=> 필요한 프로그램이 있으면 window 같은 경우 ms사에 돈주고 구매하면 됨.
=> 우분투는 오픈소스
=> 필요한 것이 잇으면 우분투 패키지 저장소에 가서 필요한 것을 다운 받아서 사용
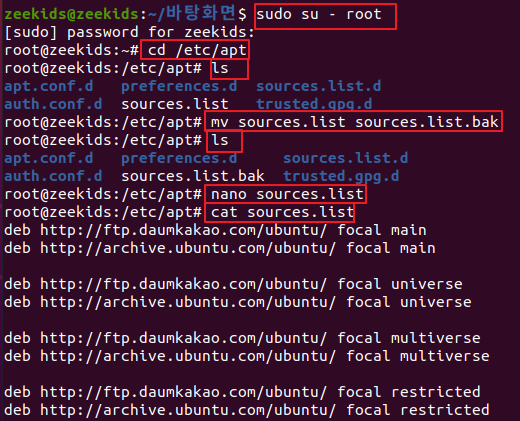
마우스 우클릭-Open in Terminal
splunk@splunk:~/바탕화면 $ sudo su - root
[sudo] password for splunk : 1234
root@splunk:~# cd /etc/apt
root@splunk: /etc/apt # ls
root@splunk: /etc/apt # mv sources.list sources.list.bak #문제발생 가능성 때문에 백업
root@splunk: /etc/apt # ls
root@splunk: /etc/apt # nano sources.list #내용 입력
deb http://ftp.daumkakao.com/ubuntu/ focal main
deb http://archive.ubuntu.com/ubuntu/ focal main

deb http://ftp.daumkakao.com/ubuntu/ focal universe
deb http://archive.ubuntu.com/ubuntu/ focal universe

deb http://ftp.daumkakao.com/ubuntu/ focal multiverse
deb http://archive.ubuntu.com/ubuntu/ focal multiverse

deb http://ftp.daumkakao.com/ubuntu/ focal restricted
deb http://archive.ubuntu.com/ubuntu/ focal restricted

#입력 후
Ctrl + O enter
Ctrl + X
root@splunk: /etc/apt # cat sources.list #작성한 내용 확인
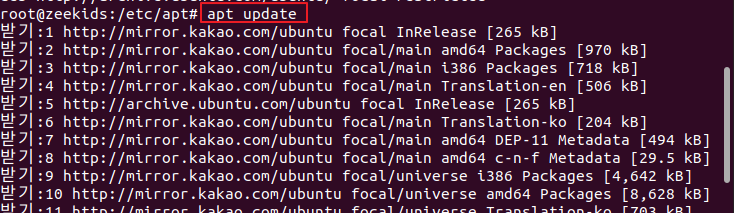
root@splunk: /etc/apt # apt update
root@splunk: /etc/apt # apt install -y net-tools
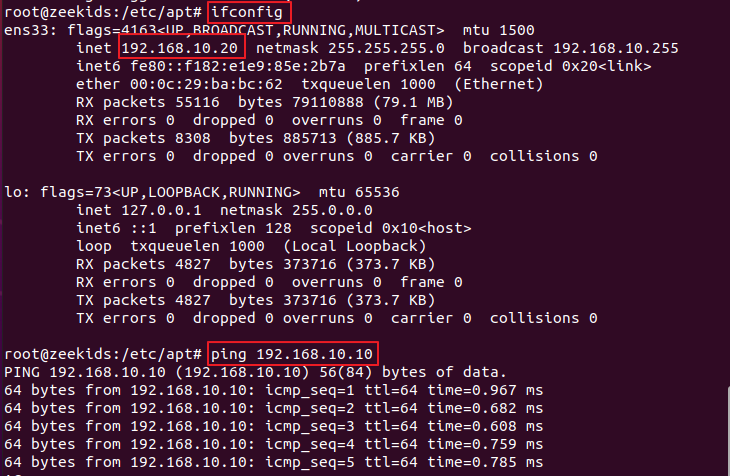
root@splunk: /etc/apt # ifconfig # ip 설정 확인
*Splunk와 ZeekIDS가 모두 설정되었다면 핑테스트를 진행합니다.
[ZeekIDS에서 입력] ping 192.168.10.10
6) 전체 명령어 사진

Cent OS 설치 및 환경설정
1) Create a New Virtual Machine을 클릭하여 다음과 같이 설정합니다.
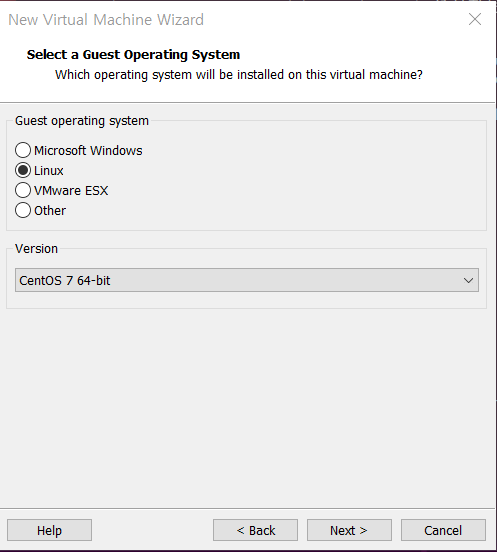

=> 사진에 없는건 Default
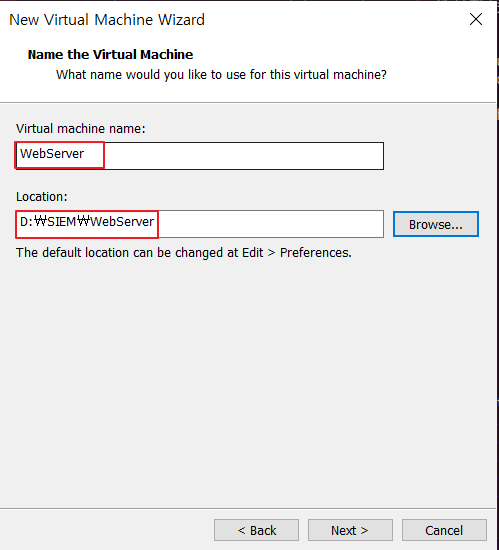
2) WebServer를 생성 후 Edit virtual machine settings를 클릭하여 다음과 같이 설정해줍니다.
=> Network Adapter를 VMnet8(NAT)로 설정
=> CD/DVD에 다운받은 이미지 파일 사용
3) Power on this virtual machine을 클릭하여 가상머신을 켜고, 최초 환경설정을 합니다. 네트워크도 모두 설정합니다.
[이전 포스팅 연결]
=> 현재 비공개 포스트
4) 잘 설정되었는지 확인합니다.
[webserver@localhost 바탕화면] $ su - root
암호 : 1234
[root@localhost~] # ifconfig
*잘 설정되었다면 핑테스트를 진행합니다.
[WebServer에서 입력] ping 192.168.10.10
[WebServer에서 입력] ping 192.168.10.20
5) lock이 걸려있다고해서 패스ㅎㅎ
# ubuntu 저장소 기록 파일 위치
cd /etc/apt
apt update
# CentOS저장소 기록 파일 위치
cd /etc/yum.repos.d
yum update
[root@localhost~] # cd /etc/yum.repos.d
[root@localhost yum.repos.d] # ls
[root@localhost yum.repos.d] # yum update
=> lock이 걸려있다고해서 패스ㅎㅎ
Window10 설치 및 환경설정
1) Create a New Virtual Machine을 클릭하여 다음과 같이 설정합니다.
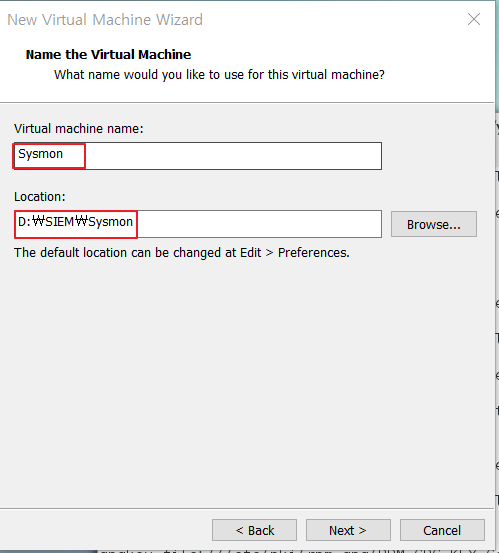
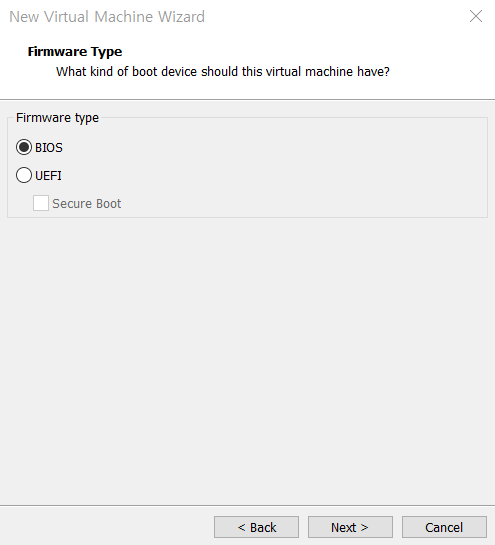
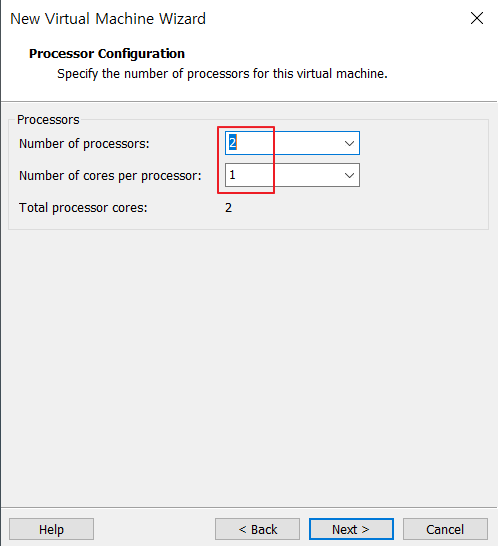
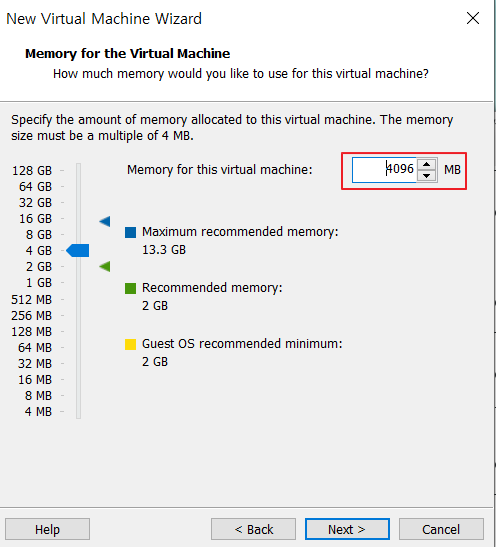
=> 사진에 없는건 Default
2) Sysmon을 생성 후 Edit virtual machine settings를 클릭하여 다음과 같이 설정해줍니다.

=> Network Adapter를 VMnet8(NAT)로 설정
=> CD/DVD에 다운받은 이미지 파일 사용
3) Power on this virtual machine을 클릭하여 가상머신을 켜고, 최초 환경설정을 합니다. 네트워크도 모두 설정합니다.
[이전 포스팅 연결]
=> 현재 비공개 포스트